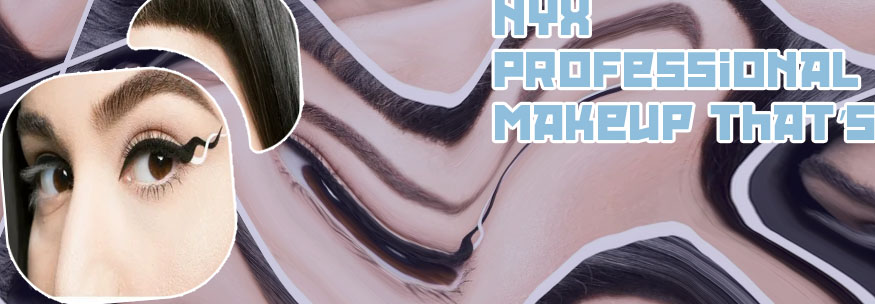
Eyeliner 3ina
Achieving the perfect winged eyeliner with gel liner can be a challenge, but having the right brush can make all the difference. In this list of articles, we will explore various tips and techniques to help you master the art of applying gel liner with a brush. From choosing the right brush to mastering different eyeliner looks, these articles will provide you with the guidance you need to achieve flawless results.
The Ultimate Guide to Choosing the Right Gel Liner Brush
When it comes to achieving the perfect winged eyeliner look, the right gel liner brush can make all the difference. With so many options on the market, it can be overwhelming to choose the best one for your needs. That's why we have compiled this ultimate guide to help you make an informed decision.
First and foremost, it's important to consider the bristles of the brush. Look for a brush with synthetic bristles that are firm yet flexible, allowing for precise application of gel liner. A brush with a fine tip will help you create sharp, clean lines, while a brush with a slightly angled shape can make it easier to achieve the perfect wing.
Next, consider the handle of the brush. A brush with a comfortable grip will make it easier to control the brush and create smooth, even lines. Look for a brush with a sturdy handle that feels comfortable in your hand.
Finally, don't forget to consider the overall quality of the brush. Investing in a high-quality brush may cost more upfront, but it will last longer and provide you with better results in the long run.
In conclusion, choosing the right gel liner brush is essential for achieving a flawless eyeliner look. By following the tips outlined in this guide, you can find the perfect brush for your needs
Tips and Tricks for Perfecting Your Gel Liner Application
Gel eyeliner can be a fantastic addition to your makeup routine, providing a bold and long-lasting look. However, mastering the application of gel liner can be tricky for many. Here are some expert tips to help you perfect your gel liner application:
-
Use the right brush: A fine, angled brush is essential for precise application of gel liner. Make sure to choose a brush that is firm enough to provide control, but also soft enough to glide smoothly along your lash line.
-
Warm up the product: Before applying gel liner, warm up the product on the back of your hand. This will help to soften the gel and make it easier to work with, resulting in a smoother application.
-
Start with small strokes: Instead of trying to create a perfect line in one swipe, start by applying small strokes along your lash line. This will help you to build up the intensity and shape of the line gradually, allowing for more control and precision.
-
Set the liner with powder: To prevent your gel liner from smudging or transferring throughout the day, set it with a matching eyeshadow powder. Simply use a small angled brush to apply the powder over the gel liner, locking it in place for long-lasting wear.
-
Clean up any mistakes:
How to Create Different Eyeliner Looks Using a Gel Liner Brush
Creating different eyeliner looks using a gel liner brush can be a fun and versatile way to switch up your makeup routine. Whether you prefer a subtle, everyday look or a bold, dramatic statement, a gel liner brush allows for precision and control in application. Here are some tips to help you achieve a variety of eyeliner looks with ease:
-
Winged eyeliner: To create a classic winged eyeliner look, start by drawing a thin line along your upper lash line using a gel liner brush. Then, extend the line outward and slightly upward at the outer corner of your eye to create a wing. You can make the wing as subtle or as dramatic as you like by adjusting the length and angle.
-
Smudged eyeliner: For a smoky, smudged eyeliner look, apply gel liner along your upper and lower lash lines using a gel liner brush. Then, use a smudge brush or a cotton swab to gently blend and soften the lines for a more lived-in effect. This technique is perfect for creating a sultry, grunge-inspired look.
-
Graphic eyeliner: If you're feeling bold and creative, try experimenting with graphic eyeliner looks using a gel liner brush. From geometric shapes to abstract designs, the possibilities
Expert Advice on Maintaining and Cleaning Your Gel Liner Brush
Maintaining and cleaning your gel liner brush is essential for keeping it in top condition and ensuring a flawless application every time. To prolong the lifespan of your brush, follow these expert tips.
First and foremost, always remember to clean your gel liner brush after each use. Use a gentle brush cleaner or a mild shampoo to remove any leftover product from the bristles. Gently swirl the brush in the cleaner and rinse it thoroughly with lukewarm water. Avoid using hot water as it can damage the bristles.
After cleaning, reshape the bristles and lay the brush flat to dry. Avoid drying the brush upright as water can seep into the ferrule and loosen the glue that holds the bristles in place. Once the brush is completely dry, store it in a brush holder or a protective case to prevent dust and bacteria buildup.
In addition to regular cleaning, it is important to replace your gel liner brush every 6-12 months, depending on how frequently you use it. Over time, the bristles can become frayed and lose their shape, affecting the precision of your application.
By following these simple maintenance tips, you can ensure that your gel liner brush stays in optimal condition and delivers flawless results every time. Remember, a well-maintained brush is key to